Need a new search?

If you didn't find what you were looking for, try a new search!

Cinnamon Pecan

Post|By |2019-05-08T13:55:38+03:00May 7th, 2019|Categories: ALL RECIPES, APPETIZERS|Tags: , , , , , , , |

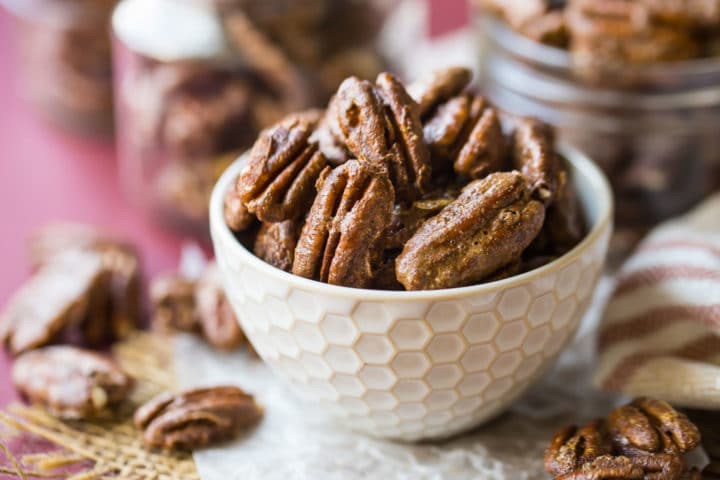
Cinnamon Pecan

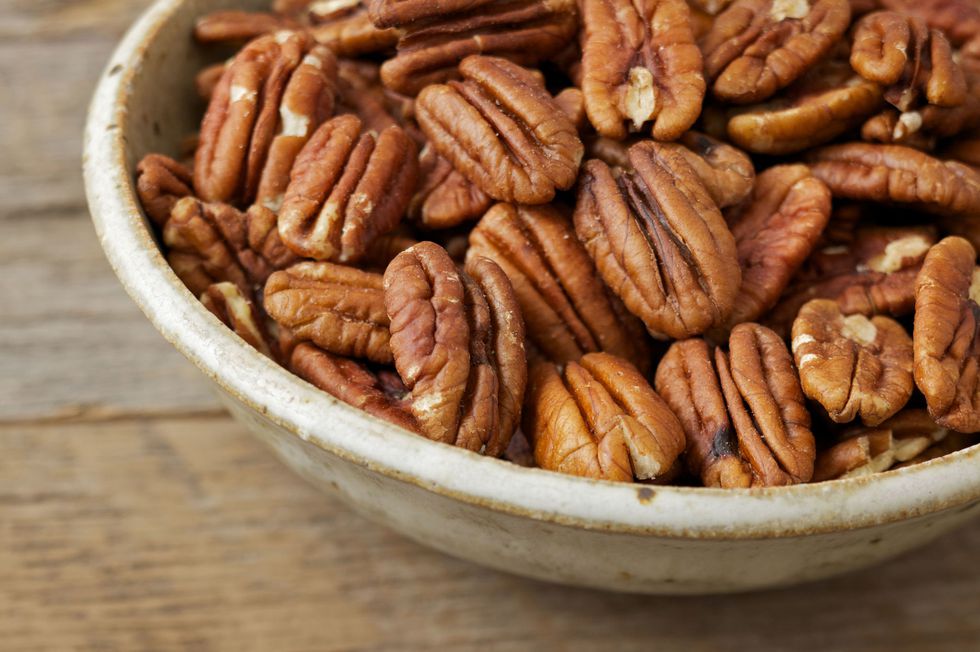
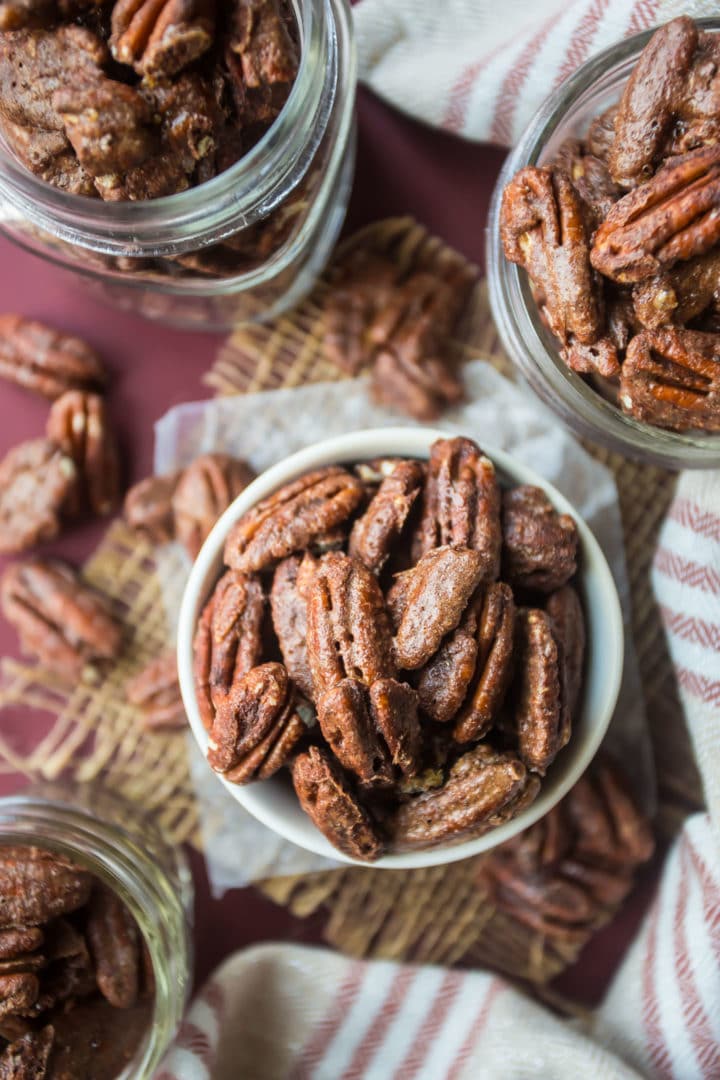
These cinnamon walnuts are light, crunchy and quite sweet. In addition to being a good snack, it is a good complement for your salads or vegetable garnish. Homemade gift ideas are also a good option. This recipe is definitely sweet, but you’ll see that it is balanced with plenty of cinnamon and a little salt. The first bite will not take 10 minutes to make this sweet snack you feel is in an harmony. It can be a little difficult to wait for the walnuts to slowly crisp in the oven.
What is pecan and what is its benefits?

Walnut recipes are quite a lot, but we recommend you try this recipe with pecan walnuts. Pecan is a native American hickory (American walnut tree) species in Northern Mexico and the Mississippi River. This tree grows in South America for the US, especially in Georgia and in Mexico, which produces about half of the world total. The original name of Pecan ”comes from the word “Algonquin” which means “nut that requires a stone to crack”. Pecan, especially in the diet of the kitchen has a large place. Most of the Native American tribes believed that walnuts were a basic food in autumn and winter, and even traded the walnuts in monetary terms. It is a nutrient containing high antioxidants and omega-6 fatty acids, which are thought to protect heart health, reduce cholesterol and help prevent such diseases. A study published in the September 2001 issue of the Journal of Nutrition found that eating a handful of walnuts per day had cholesterol-lowering effects similar to the leading cholesterol drugs. While the content of pecan walnut was high in protein and fiber, the saturated fat was low and this situation was popular for vegetarian peppers. makes an alternative source of protein. Pecan also has many vitamins and minerals such as thiamine, magnesium, phosphorus and manganese.
Ingredients

6 cups pecan halves
2 egg whites (from large eggs)
3/4 cup granulated sugar
3 tablespoons cinnamon
1 tablespoon water
1/2 teaspoon kosher salt

Instructions

  1. Preheat the oven to 250 degrees F, and line a baking sheet with a silicone mat.

  2. Place the pecans in a large mixing bowl, and add the egg whites, sugar, cinnamon, water, and salt.

  3. Stir together until all the nuts are coated with the glaze.

  4. Transfer the pecans to the prepared baking sheet and spread out into an even layer.

  5. Bake for 90 minutes, then allow to cool until crisp.

  6. Keep cooled cinnamon pecans in cellophane bags or airtight containers.

Home Made Ricotta

Post|By |2019-08-01T16:09:07+03:00August 1st, 2019|Categories: ALL RECIPES, BREAKFAST & BRUNCH|Tags: , |

Home Made Ricotta

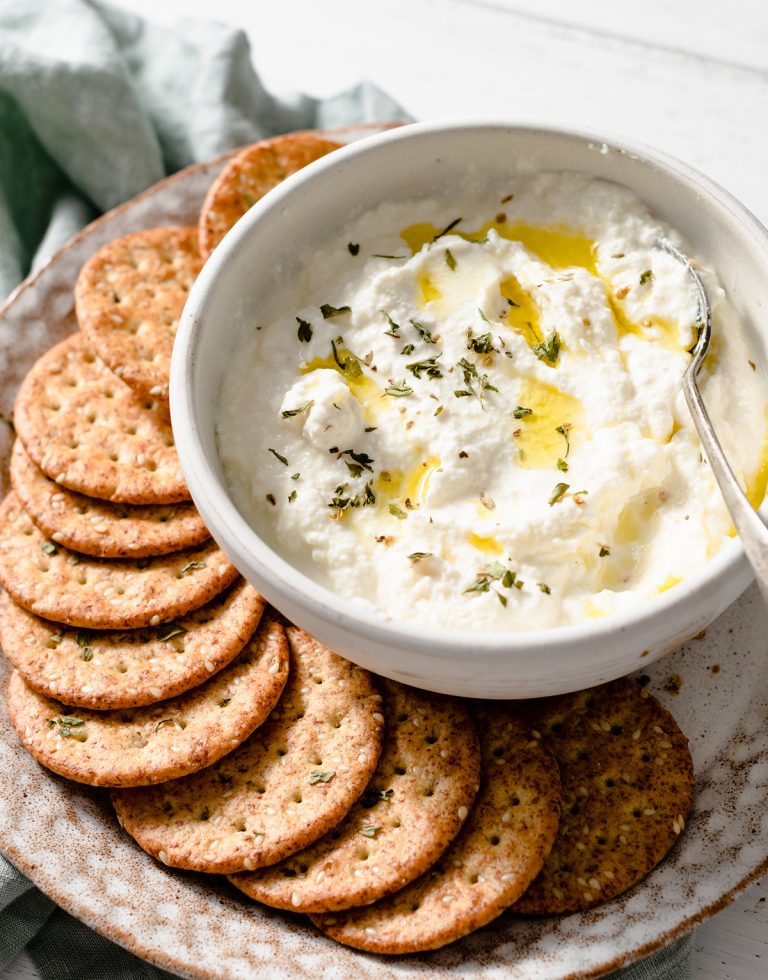
Homemade ricotta can make you think it’s a compelling recipe. This is a mistake! You don’t want to get ready form when you get used to the flavor and texture of homemade ricotta. With this recipe, you can try our ricotta cheese recipes with lemon ricotta pancakes

You can use this homemade ricotta in the same way instead of the ricotta from the store. The sauce is quite delicious, you can serve with pasta or add to desserts.

You can also adjust the thickness for yourself when you make it at home. To do this, adjust the straining time. Add honey and cinnamon and dip your crispy crackers into a nice and light and creamy dip.

What is the ingredients of Ricotta?

The ingredients are quite simple; Milk, cream, salt and lemon juice …

The most important trick here is that milk is natural fat milk. Never use pasteurized milk.

If there is no lemon juice, you can also use white vinegar. But to catch the acidity you need to add an extra 1 spoon.

How to make Home Made Ricotta?

It takes only a few steps to get the most delicious ricotta:

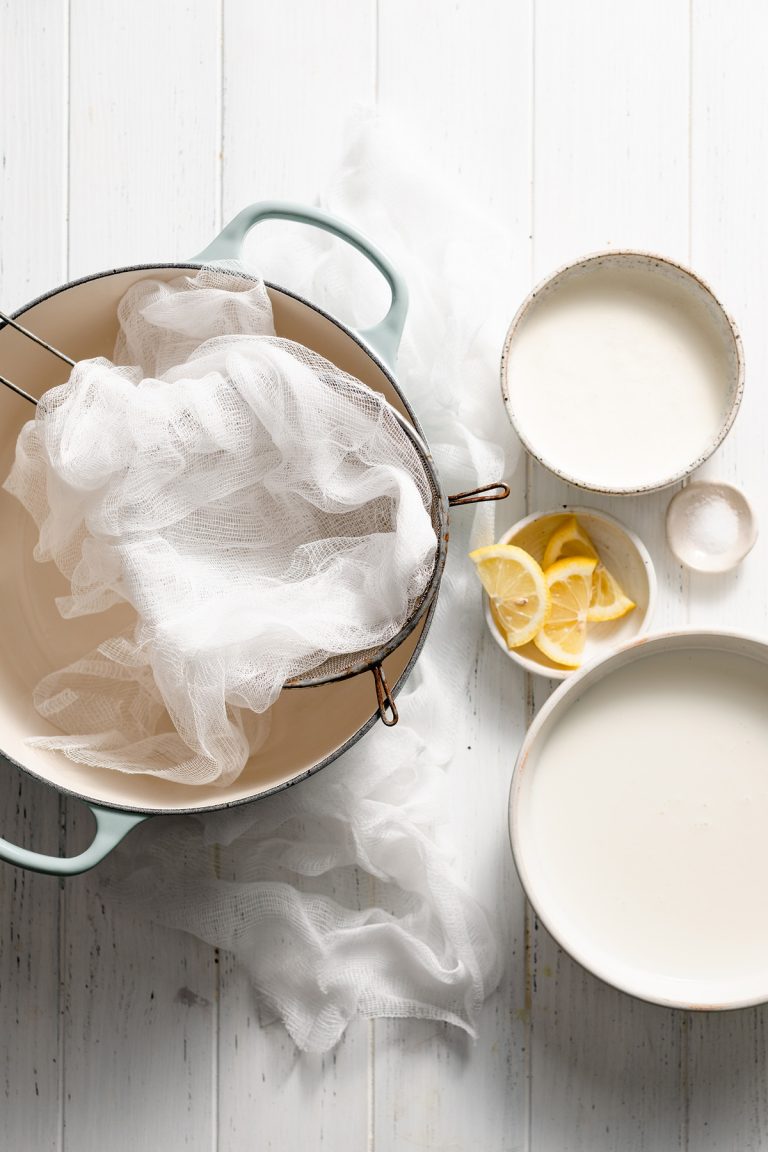
Prepare a sieve for straining: prepare a large fine mesh sieve coated with several layers of cheesecloth. Place on a large bowl.
Add milk and salt to the pan: Pour the milk and cream into a 5 -6 quart pot. Add salt.
Allow to simmer: Heat the mixture over medium heat and mix thoroughly to allow to boil.
Lemon is added: When it reaches the boiling point, remove from the stove and mix immediately into lemon juice. Let it rest for 2 minutes.
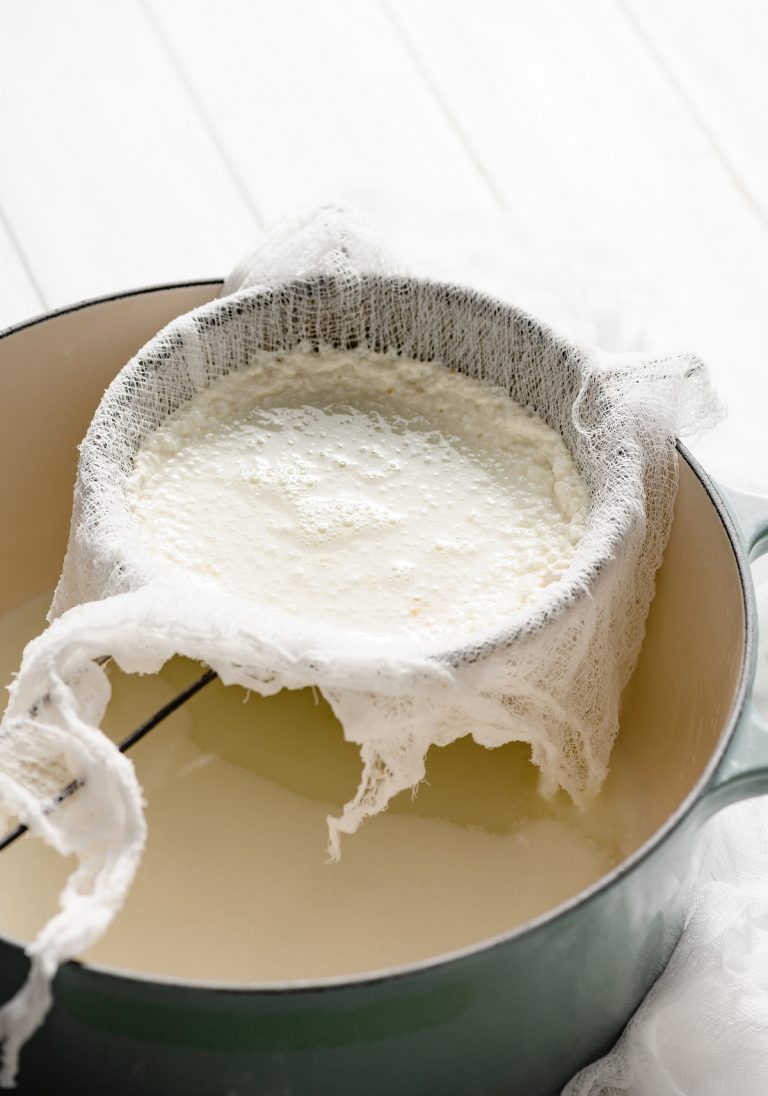
Take the mixture to the strainer: Carefully pour the mixture into the prepared sieve, pouring more mixture from the bowl as the liquid draws itself.
Reach desired level: Allow to rest to achieve the desired consistency: Allow the curd to rest for 1 to 60 minutes, depending on how moist / dry it is (I’m waiting for about 10 minutes).
Continue cooling: transfer to the refrigerator and cool to cool. Store in the refrigerator for 4 to 5 days.

Ingredients

7 cups whole milk (not ultra pasteurized)
1 cup heavy cream
3/4 tsp salt, or to taste
3 Tbsp fresh lemon juice

Steps

  • Line large fine mesh sieve with several layers of cheese cheesecloth. Set over a large bowl.
  • Pour milk and cream into a 5 or 6 quart pot. Add salt.
  • Heat mixture over medium heat and let come to a full boil, stirring frequently.
  • Once it reaches the boil, remove from heat and immediately stir in lemon juice. Let rest 2 minutes.
  • Carefully pour mixture through prepared sieve, while draining off liquid from bowl as it fills as needed.
  • Let curds strain 1 - 60 minutes depending on how moist/dry you'd like it (I prefer around 10 minutes).
  • Transfer to fridge and chill until cold. Store in refrigerator up to 5 days.

Kamkuat Jam

Post|By |2019-07-24T11:21:37+03:00July 18th, 2019|Categories: ALL RECIPES, BREAKFAST & BRUNCH, DESSERTS, Uncategorized @tr|

Kamkuat Jam

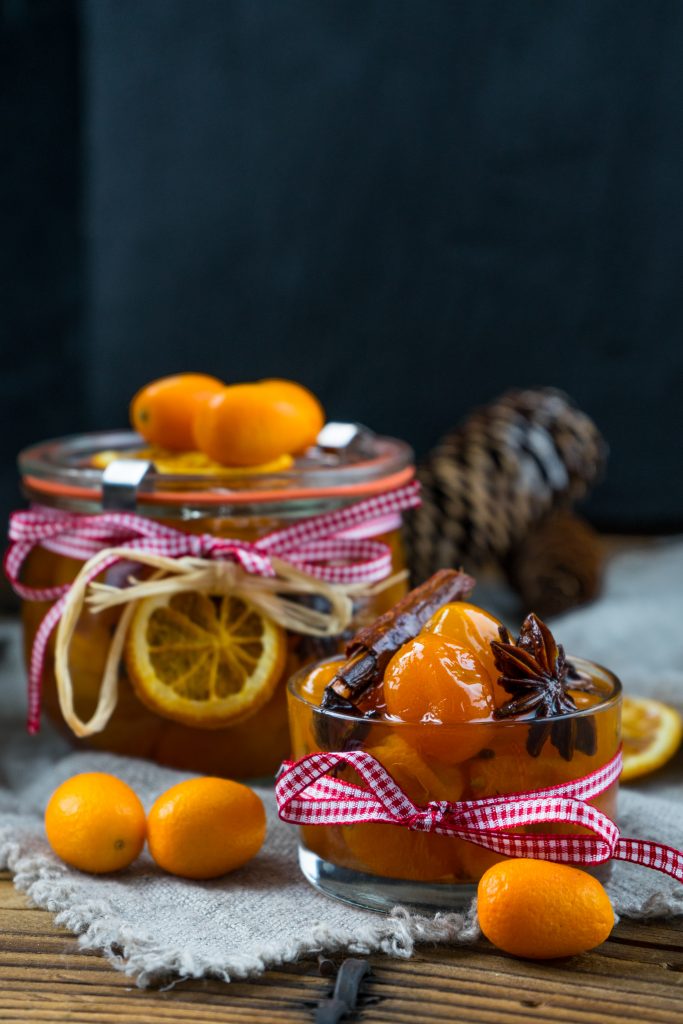
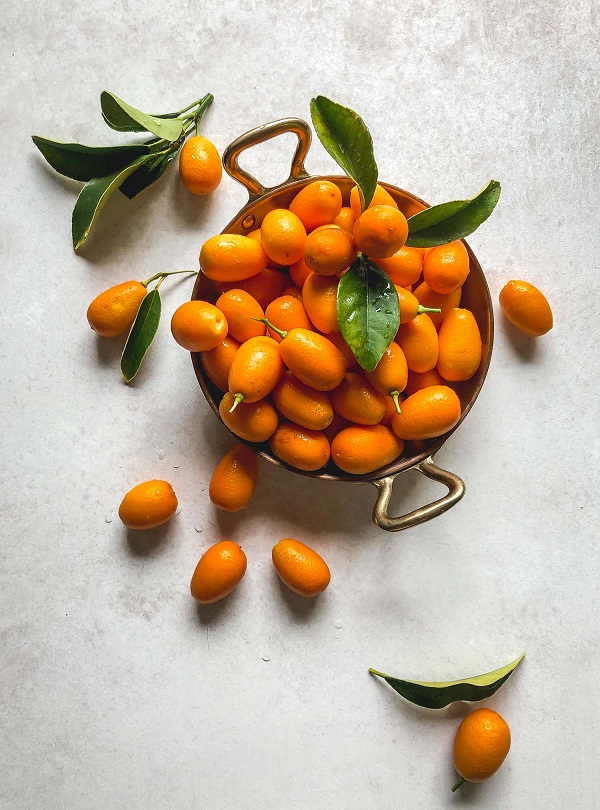
I promise you, Kumkuat jam will wrap your kitchen with a fragrant smell, and you will drunk from this smell. The benefits of Kumkuat can be found in detail below.

What is Kamkuat?

A Kumquat is no bigger than a grape, but a little bite gives a intense taste like a big fruit in the mouth. It is filled with intense citrus flavor.

In Chinese, Kumquat means “golden orange”. Orginally, it grows in China. Now they grows in other places in the United States, including Florida and the hottest regions such as Distance.

The tree of other citrus fruits, the peel of the kumquat is sweet and edible.

Kumquat is worth other than the rich vitamin C and fibers. In fact, in one serving you make more fiber than any other fresh fruits.

A portion of 100 grams (about 5 whole kumquats) contains:

Calories: 71
Carbohydrate: 16 grams
Protein: 2 grams
Fat: 1 gram
Fiber: 6.5 grams
A Vitamin: 6% of RDI
Vitamin C: 73% of RDI
Calcium: 6% of RDI
Manganese: 7% of RDI

Kumquat also provides a smaller amount of vitamin B, vitamin E, iron, magnesium, potassium, copper and zinc.

Edible seeds and kumquat bark provide a small amount of omega-3 oil.

Kumquats, like other fresh fruits, are moisturizing. Approximately 80% of their weight is water.

Kumkat’s high water and fiber content makes a meal satisfying, but their calories are so low. This makes your weight a great snack.

Ingredients

500 g kumquat
800 ml of water
500 g of sugar
2 cinnamon sticks
2 star anise
2 cloves
½ lemon juice
2 tablespoons rum (optional)

Steps

  • Wash Kumquats thoroughly and rub dry with a cloth, cutting away the stems (if any).
  • Bring the water to a boil in a sufficiently large saucepan, add the sugar and spices and cook until the sugar has completely dissolved. Put kumquats in the saucepan and simmer over medium heat for about 10 minutes.
  • Remove the pan from the heat and let the kumquats soak in the pan overnight.
  • The next day, add the lemon or orange juice and, if you like, the rum to the kumquats.
  • Boil everything again, after about 5 minutes the kumquats with a spoon from the
  • Take syrup and distribute in sterilized screw cap or Rex glasses. If you like, you can also distribute cinnamon sticks and star anise in the glasses.
  • Make the syrup boil for another 15 minutes, pour over the kumquats and immediately shoot the glasses.

Sleep as a baby: Moon Milk

Post|By |2019-07-12T10:26:03+03:00July 12th, 2019|Categories: ALL RECIPES, DRINKS, Hot Drinks|Tags: |

Moon Milk

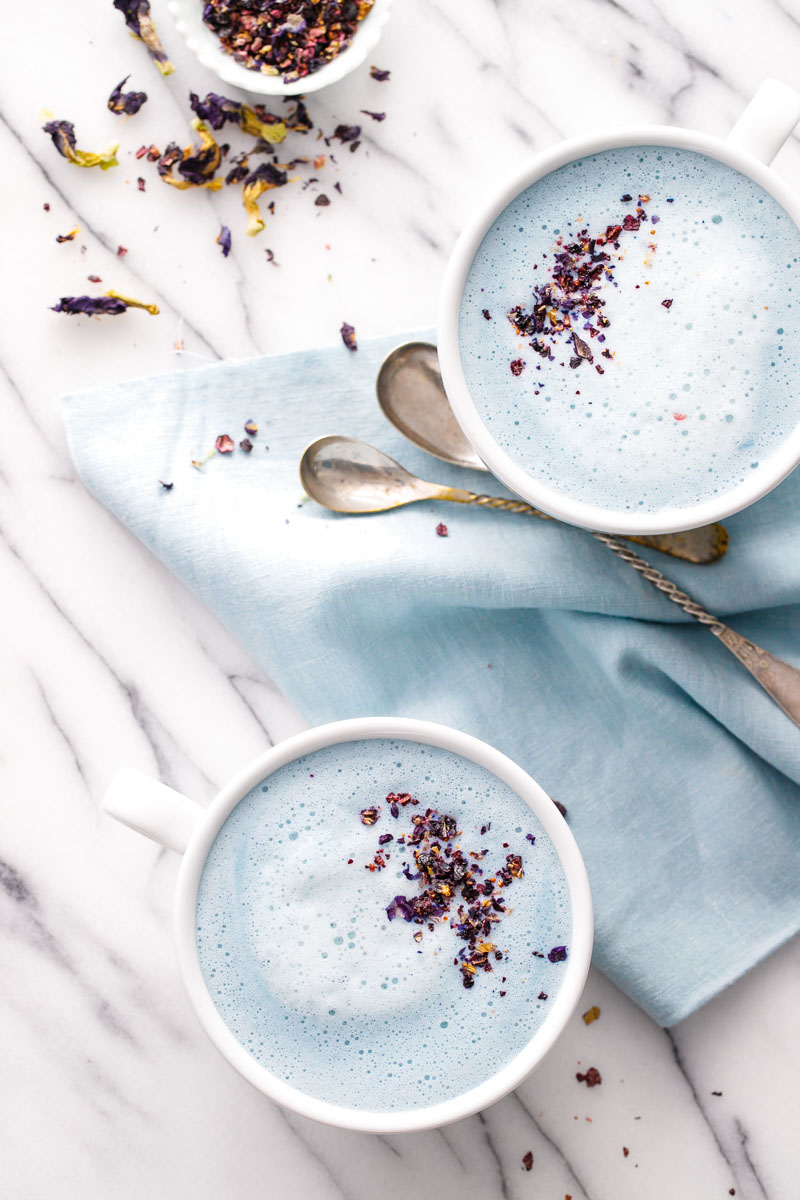
Moon Milk seems like a new trend, but it is actually a century-old Ayurvedic solution to insomnia. Ayurveda nutrition is a thyrapy that Maharishi Ayurveda is claimed to be present or presented by a “self-healing, managing, calm father to lose balance”  If You drink a cup of Moon Milk before you go to bed, you will sleep peacefully.

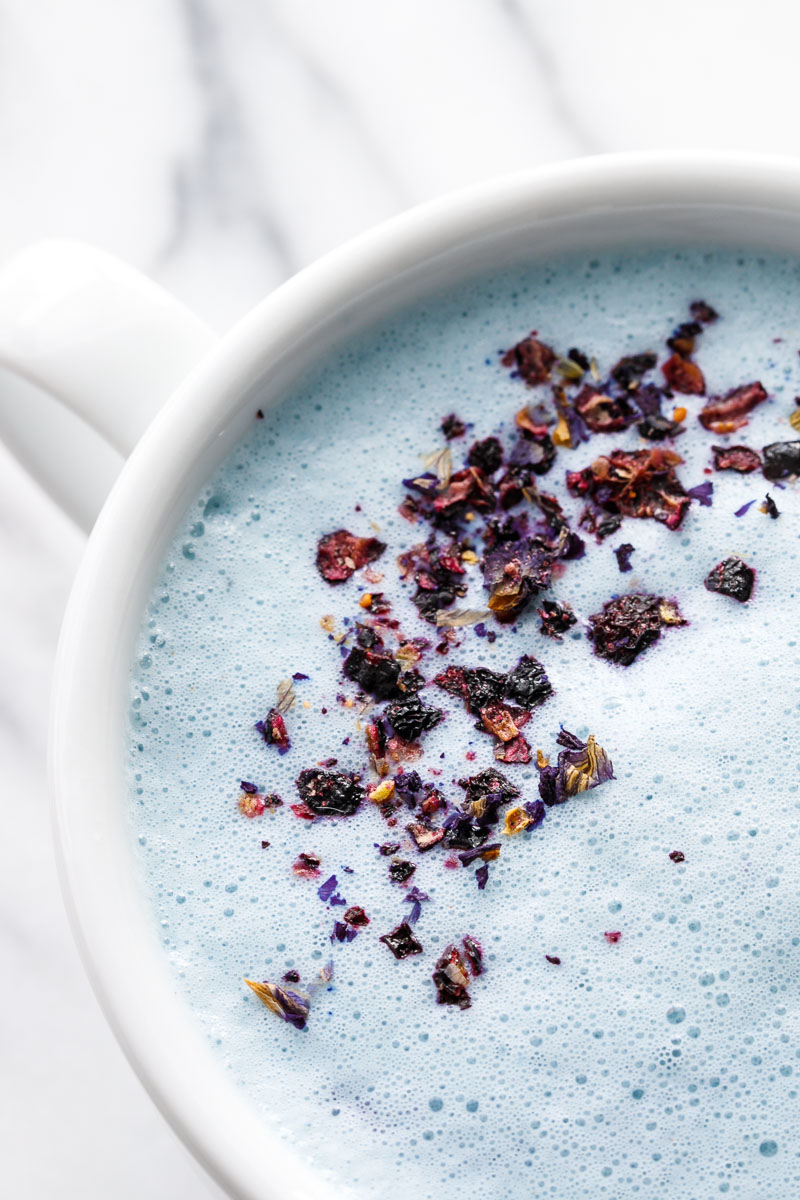
How this drink gets blue? Blue Pea Flower Powder. We prefer this flower because of its beautiful smell and intense color, but its main effect is also known as “Sleep Flower”. You can buy it here or grow the plant at home. You can dry the collected flowers and use them during the winter.

What is butterfly pea flower?

“Blue Butterfly Pea Flower” has been used as a decaffeinated herbal drink in Southeast Asia for centuries. This plant is also used as food and garment dye.

Like green tea, “Pea Flower Tea” is full of powerful antioxidants and helps protect the skin from premature aging.

Additional studies have been conducted to demonstrate the ability of tea to help fight internal inflammation. In general,Blue Butterfly Pea Flower and tea are used to treat general pain, reduce inflammation, help with common eye problems such as conjunctivitis, fight certain types of cancer, promote brain health and improve vitality..

Ingredients

1 cup milk of your choosing (I like whole milk, cashew milk, and almond milk)
1 tablespoon maple syrup, or to taste
1 teaspoon butterfly pea flower powder
1/4 teaspoon ground cinnamon
pinch freshly ground nutmeg
1/4 teaspoon ashwagandha powder (optional)

Read more at https://www.loveandoliveoil.com/2018/02/blue-moon-milk.html#26FyZk435o34GfGX.99

Steps

  • In a small saucepan set over medium-low heat, whisk together milk with maple syrup, butterfly pea powder, and spices until powder is dissolved and milk is warm but not yet simmering.
  • Whir briefly using a handheld milk frother for a latte-like finish, or whisk vigorously to create a fine froth.
  • Pour into warm mug and enjoy. Optionally top with a sprinkle of ground up butterfly pea flowers and freeze-dried blueberries.

Semolina Dessert With Ice cream

Post|By |2019-06-28T10:31:36+03:00June 27th, 2019|Categories: ALL RECIPES, dessert with syrup, DESSERTS, Ice Cream + Sorbet|Tags: , , , , , |

Semolina Dessert With Ice cream

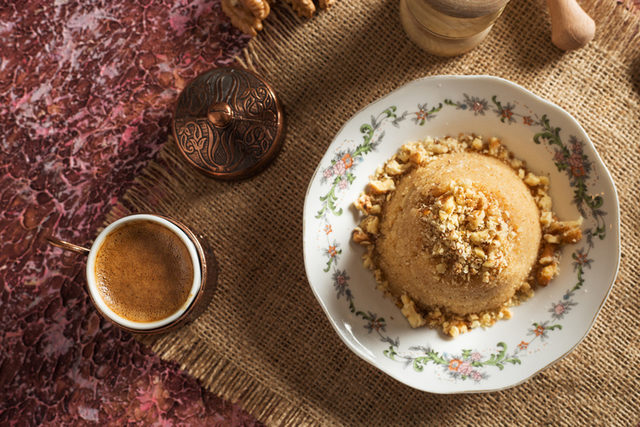
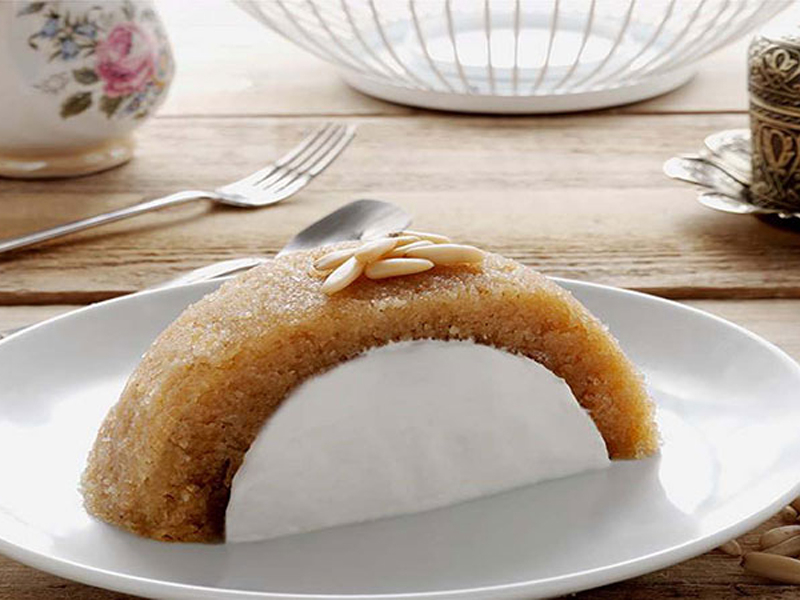
Have you ever tried a traditional Turkish dessert “semolina dessert or semolina halva” that comes from Ottoman cuisine? We will give you a different recipe of this delicious dessert for the hot days of summer.  And here it is; we introduce you the marvelous dessert of the palace “Semolina Dessert With Ice cream”.

semolina dessert

What is semolina?

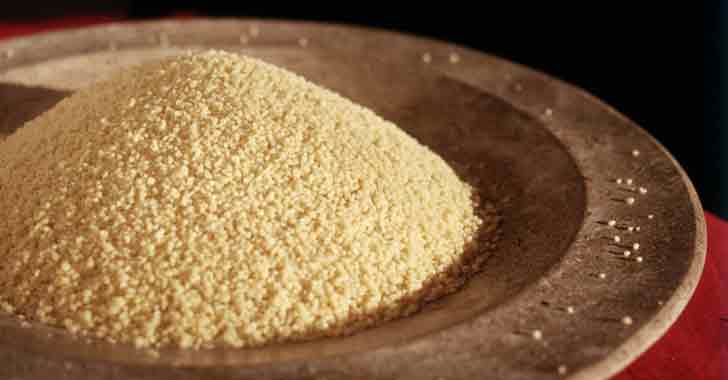
Semolina is a coarse flour made from durum wheat, a hard type of wheat.

When ground into a flour, durum wheat is known as semolina and used all over the world in bread, pasta, and porridge. This flour is darker and more golden in color than all-purpose flour. It has a mild, earthy aroma.

Along with its culinary uses, semolina also benefits weight management, heart health, and your digestive system.

Calories: 198 calories
Carbs: 40 grams
Protein: 7 grams
Fat: less than 1 gram
Fiber: 7% of the Reference Daily Intake (RDI)
Thiamine: 41% of the RDI
Folate: 36% of the RDI
Riboflavin: 29% of the RDI
Iron: 13% of the RDI
Magnesium: 8% of the RDI

semolina dessert

Benefits of semolina

Semolina flour can be enriched, meaning that food manufacturers re-add nutrients that were lost during the processing of the durum wheat grain. Enriched semolina flour is nutritious and provides high levels of various B vitamins, iron, protein, and fiber.
Foods rich in protein and fiber — like semolina — can increase feelings of fullness and reduce hunger. In turn, this may promote weight loss. Semolina is rich in nutrients like fiber, folate, and magnesium — all of which protect your heart and may reduce your risk of heart disease. Semolina is a great source of magnesium and fiber — two nutrients that may improve blood sugar levels and reduce your risk of type 2 diabetes. Semolina is a good source of non-heme iron. Iron is an essential mineral for transporting oxygen, preventing anemia, and supporting growth and development. The high fiber content of semolina supports digestion by stimulating the growth of beneficial gut bacteria and promoting regular bowel movements. The coarse and stretchy texture of semolina makes it an excellent type of flour for bread, pasta, and more. Semolina is a gluten-containing grain, which is unsuitable for people with certain gluten disorders or those with an allergy to wheat.

semolina dessert

Ingredients

500 g. semolina (3,5 cups)
250 g. butter
1,5 cups of water
3 cups of milk
2 cups powdered sugar
500 g. ice cream

For the above,

Powdered pistachios, pine nuts, walnuts and cinnamon

Steps

First, put the butter in a pot and melt well.
After the oil has melted, add the semolina. (It should be roasted until the semolina is colored)
Add water and powdered sugar to a separate pot. When boiled, add the milk and cook until warm.
Milky sherbet, lightly warm after pouring into the grilled semolina pour the warm syrup and mix and close the lid.
Cook in this way for 5 to 10 minutes and infuse.
In a pit bowl, fill the semolina dessert by pressing the center of the pit. Fill the trough with ice cream and cover with semolina halva. Serve the dish by turning it upside down.

If you wish, sprinkle with pistachios, pine nuts, walnuts or cinnamon and serve.

If you want to look at other delicious dessert recipes, you can click the link.

Home Made Vanilla Extract and Vanilla Sugar

Post|By |2019-06-17T17:06:21+03:00June 17th, 2019|Categories: ALL RECIPES, DESSERTS, Desserts with Alcohol, Sauce|Tags: , , |

Home Made Vanilla Extract

You know the smell of a good vanilla extract when you open and breathe the bottle cap. Low-quality extracts lack this intensity and depth in their aromas. Nothing can be like high quality vanilla. However, high quality vanilla extracts are expensive.

The simple vanilla extract is a commercial grade extract. 100 g of stick vanilla is used in 3.7 kg alcohol of commercial grade simple extract.

However, many professional pastry makers like to use “double deck” vanilla extract. Because with the same amount of vanilla extract, it provides a much stronger vanilla flavor. Double-deck vanilla extract uses 690 g of rod vanilla per 3.7 kg. These extracts are quite expensive.

How to make home made vanilla extract ?

However, the good news is that you can make your own double-decker vanilla extract at the same price as the high-quality single-deck vanilla extract you get from the store.

Vanilla extract is delicious as you age. You can produce larger quantities to allow them to age for at least a year before use. We also recommend dark glass jars to preserve the taste. But you can also use clean light jars if you wish, but if you are going to use light jars, we recommend storing them in a dark environment.

You can use the vanilla extract 6 weeks after making it, but the vanilla essence gets better with age and you should wait optimally for 6 months. You can make a lot of vanilla extract every year and use the previous year’s party every year. 12 months pure vanilla extract is the best! But it’s even better if you use the 24-months vanilla extract!

How to made vanilla sugar?

You made vanilla extract and now you take the sticks out of the bottle? Don’t throw them in the trash – use in making vanilla sugar!

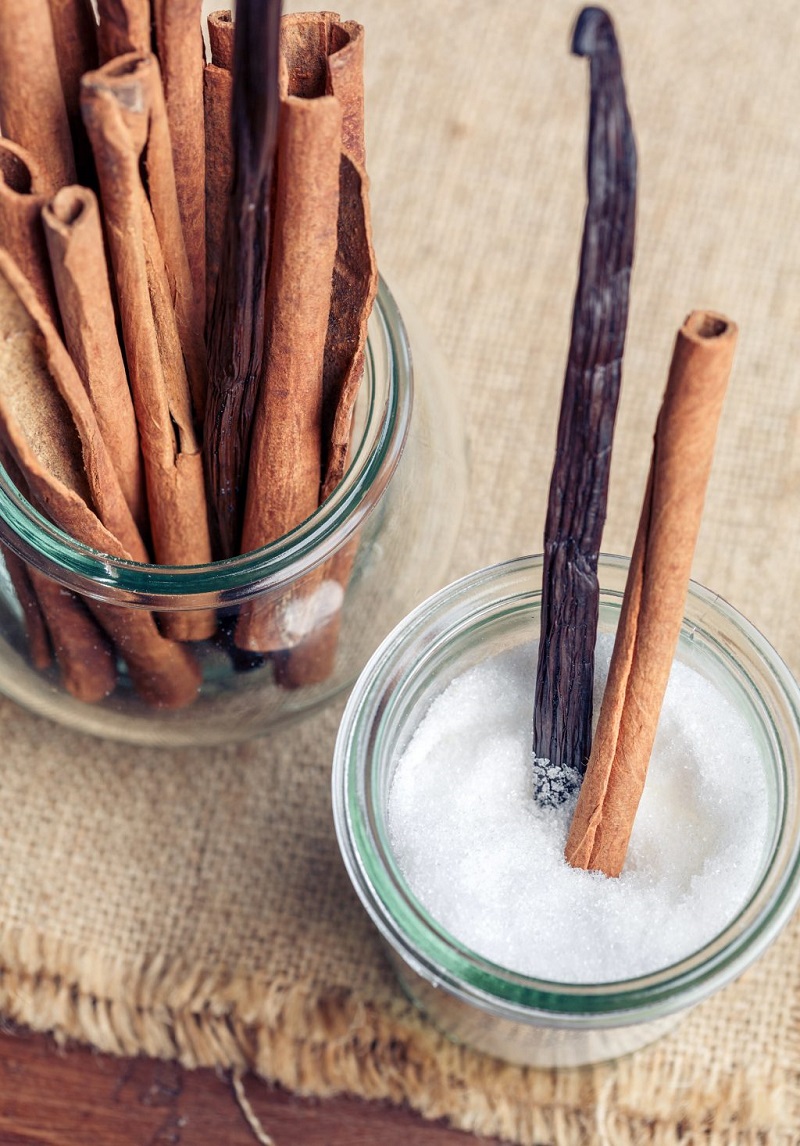
Allow the vanilla sticks to dry out for a few days and then place them in a container or zipper bag. Tightly close the mouth and wait a few weeks, occasionally shaking. Throw vanilla sticks – vanilla sugar ready to use! You can use it for 1 year.

Ingredients

Single layer vanilla extract:
250 ml -1 cup of vodka
22 g vanilla sticks (about 3 pieces)

Double layer vanilla extract:
250 ml -1 cup of vodka
44 g vanilla sticks (about 6 pieces)

Vanilla Sugar:
3 vanilla sticks
1 kg of sugar
cinnamon stick if desired

Steps

For vanilla extract;

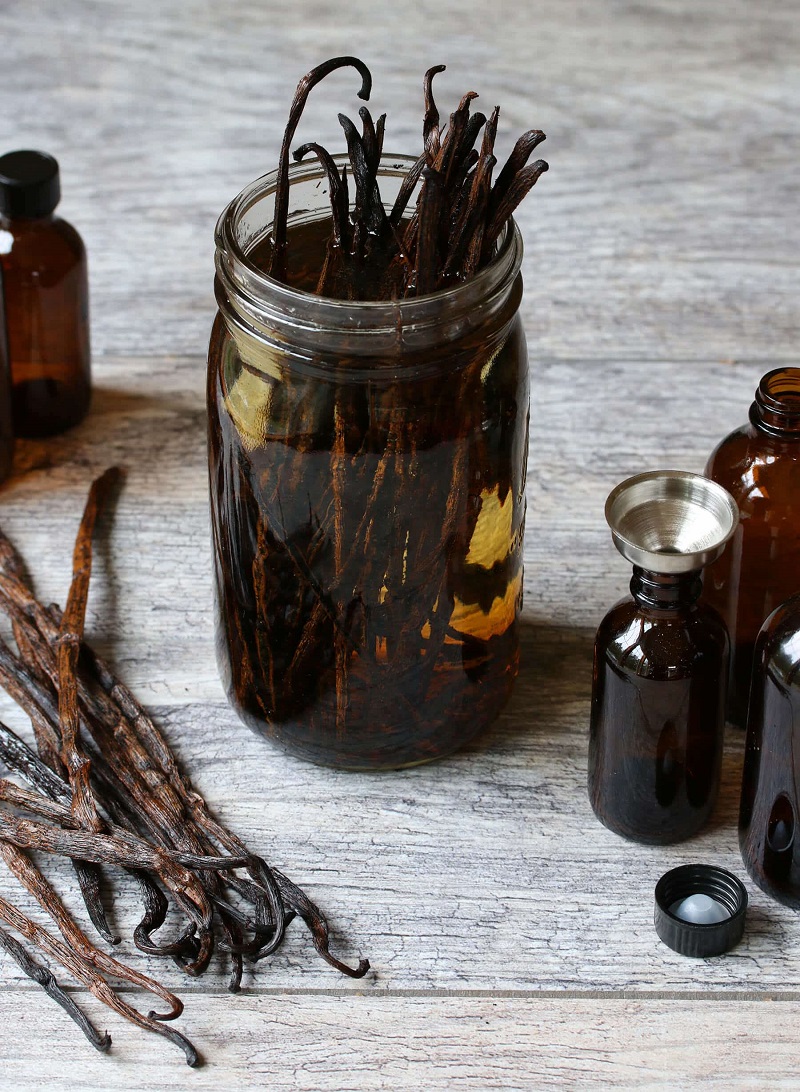
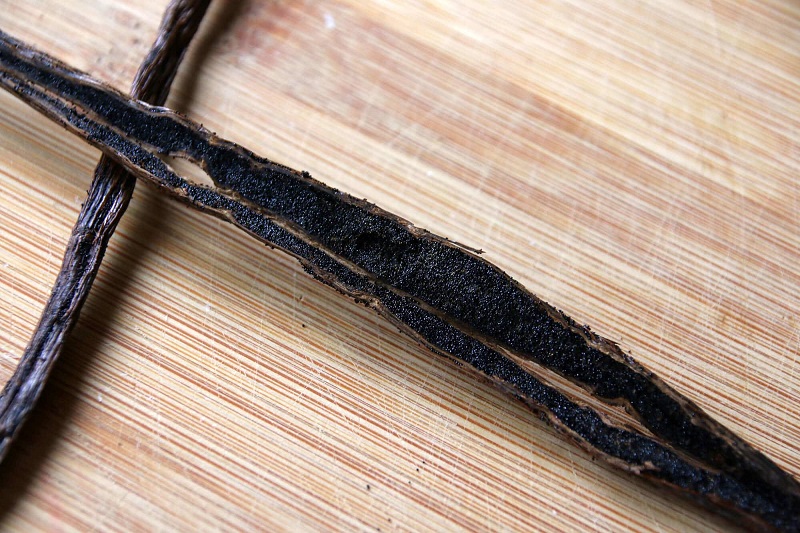
    • Cut the vanilla sticks longitudinally and scrape off the vanilla particles. Add the seeds and beans in a glass jar with the lid where you put vodka. Place the extract in a dark and cool place. Shake once in a while.
    • Extract can be used in as little as 6 weeks. For better results, use after 6 months and wait one year for best results.
    • When the extract is ready, remove the vanilla sticks from the inside and fill it into brown glass bottles with a funnel.
      Slice the vanilla sticks to fit the length of the jars and place approximately 2 in 60 ml glass bottles and 4 in 60 ml glass bottles. In this way, the extract will continue to "ripen" over time.

For Vanilla Sugar:

      • Leave the vanilla sticks out of the vanilla extract to dry out for a few days and then place them in a jar or zipper bag. Tightly close the mouth and wait a few weeks, shaking occasionally.
      • If you use new vanilla sticks, cut the vanilla sticks in half and mix the seeds with sugar. Gently rub with your hand. Then shake the mouth with the rods occasionally in a container with a lid. You can store your sugar for 1 year.

Looking fore more home made recipies?

Chai Tea Latte

Post|By |2019-06-14T14:44:32+03:00June 14th, 2019|Categories: ALL RECIPES, DRINKS, Hot Drinks|Tags: , , , , , , , , , , , , , , , , , , , |

Chai Tea Latte

Chai Tea Latte is a flavored tea drink made by brewing black tea with a mixture of aromatic spices and herbs. Located on the Indian sub-continent, the beverage has gained worldwide popularity.

What is chai tea benefits?

Reduces the risk of cancer formation. Cardamom, cinnamon and ginger have antioxidant and phytochemical contents and prevent cancer. If used regularly, it reduces the risk of bowel and stomach cancer.

Prevents colds. Especially in cold winter days, if you have a condition such as getting sick frequently or if you have weakness, you can strengthen your immune system with its ingredients. The ginger in Chai tea supports the body’s defense system.

Relieves menstrual pain. Cinnamon and ginger in Chai tea regulate hormones and have a positive effect on menstrual pains. Chai tea, which is kept in hot milk especially, will prevent your sweet attacks during these periods thanks to its aromatic taste.

Accelerates metabolism. You can accelerate your metabolism when you drink Chai tea along with the right diet recommendations. This is achieved by stimulating the digestion and pancreatic enzymes. It also creates a feeling of satiety, which causes you to eat less.

Chai tea against diabetes. In regular use, it causes positive changes in blood sugar levels. It may play a role in the prevention of Type 2 Diabetes in the long term. In the short term, you can control your blood sugar by decreasing your desire for sugar.

Reduces bloating. If you experience bloating and gas complaints, you can try Chai tea for 2 cups a day to regulate stomach activities and regulate your digestive system.

Increases energy. If your energy rises suddenly after drinking coffee and sodas and then falls rapidly, you can try increasing your energy with Chai tea.

If you want to benefit from the benefits of Chai tea, you should make the right and the right amount of consumption and maintain healthy eating habits. An average of 2 cups of Chai tea will help you get enough effects.

Ingredients

16 cardamom pods
8 sticks cinnamon, broken into pieces
8 star anise
6 cloves
1 tablespoon fennel seeds
3 vanilla sticks, cut into two pieces
80 g black tea leaves
60 g shredded coconut
1/2 teaspoon finelly grated nutmeg
2 teaspoons grated ginger
90 g honey, heated
1 tablespoon lemon juice

Desired quantity of hot water and hot milk

Steps

  1. Place cardamom, cinnamon, star anise, cloves, fennel and vanilla in a mortar and crush until small pieces are formed.
  2. In a small bowl add the spice mixture, tea, coconut, nutmeg and ginger and blend with the help of a spoon.
  3. Add honey and lemon juice and mix well to combine. Place in an airtight container in the refrigerator.
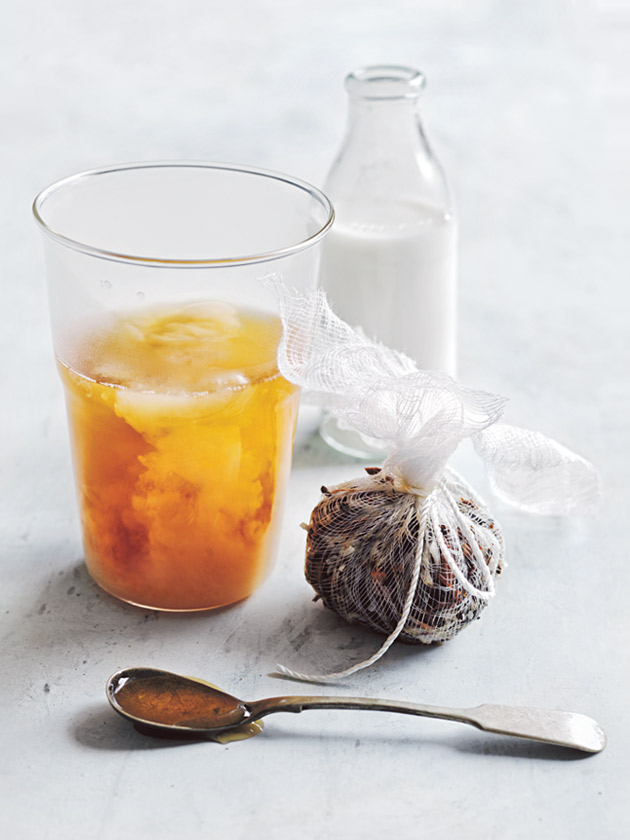
  4. Wrap the mixture in a thin cheesecloth and add to 1.5 l of boiling water. boil for about 2 min and leave to infuse. If you wish, you can release the mixture into the water. You should filter just before drinking.
  5. You can serve your hot tea with warm milk and adjust the taste with honey.
  6. Tip: You can store this tea in a closed container in the refrigerator for up to 1 month.

More drink recipie?

Apple Coffee Cake

Post|By |2019-05-13T14:30:05+03:00May 13th, 2019|Categories: ALL RECIPES, Cake, DESSERTS|Tags: , , , , |

Apple Coffee Cake

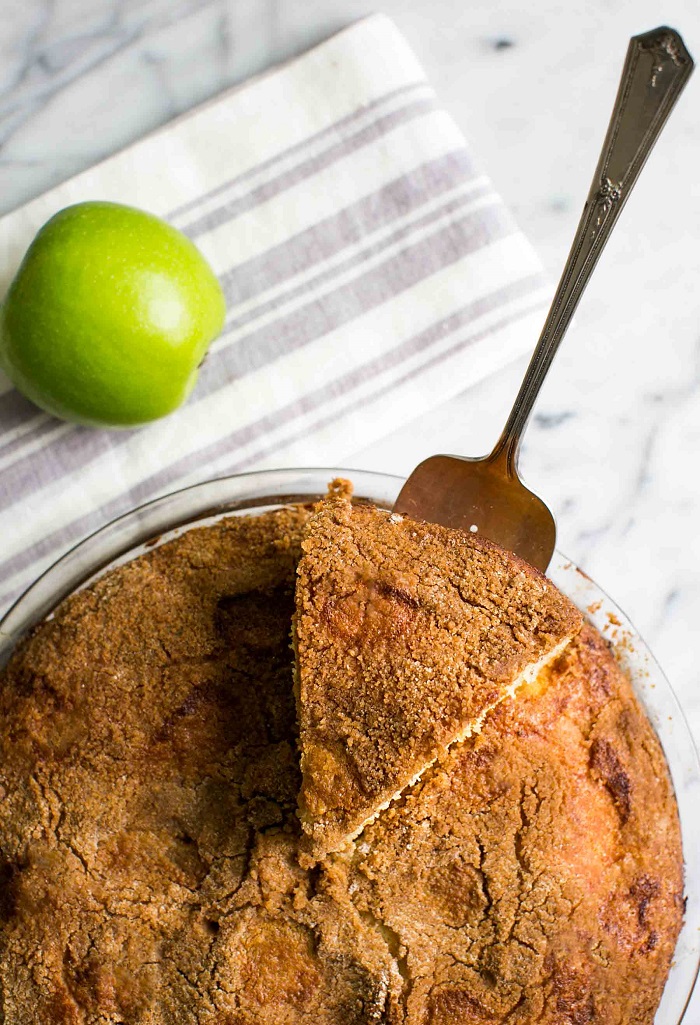
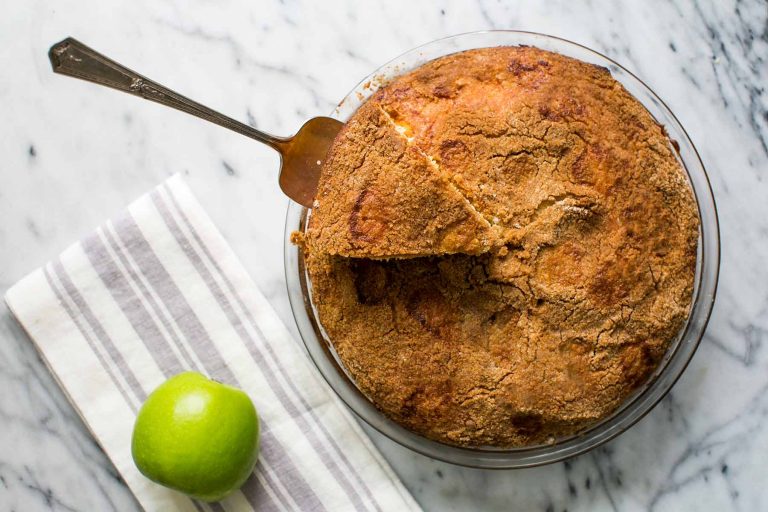
Apple Coffee Cake; The most beautiful cake recipe you can imagine with a cup of coffee on the fresh scent … When the apple and cinnamon come together, the result is always wonderful. The smell of cinnamon cake that surrounds your house will also prompt your request for a cup of coffee. Like our other dessert recipes, it has a fancy presentation. But the elegance as well as the time you spend for him is a short …

What is Streusel?

Apple Coffee Cake recipe is why the Streusel layer on the recipe is different from the others … So what is “Streusel” is a little more informative; Made for baking and pastries for streusels, cakes, breads and pies; It is a crumbled filling mixture, such as flour, butter and sugar. Some modern recipes can be added to spices and chopped nuts.

How to make traditional German Streusel?

Streusel means “brewed or dispersed” in German. Traditional German streusel recipes need a ratio of 1: 1: 2, sugar: butter or flour.

How to make American Streusel?

In contrast, American recipes are generally sweeter. It has a ratio of 3: 1: 2 or even 3: 3: 1 (sugar: butter: flour). In a 3: 1: 2 ratio, you get a very sandy structure. A 3: 3: 1 ratio will give a more brittle and spreading effect.

Ingredients

2 cups (280 g) all purpose flour
2 teaspoons baking powder
1 teaspoon salt
1/4 cup (50 g) of white granulated sugar plus 2 Tbsp sugar
1 teaspoon ground cinnamon
10 Tbsp unsalted butter (140 g), room temperature
2 eggs, beaten
1 cup (235 ml) whole milk
1 medium tart green apple, cored, peeled and sliced into 1/4-inch thick slices

Streusel topping:

4 Tbsp brown sugar
4 Tbsp flour
1/4 teaspoon cinnamon
1 Tbsp butter, cut into small cubes

Method

  1. Preheat oven, prepare pie dish: Preheat the oven to 375°F (190°C). Grease a 9-inch pie pan (can use a springform pan or square baking pan)
  2. Whisk flour, baking powder, salt: In a medium bowl, whisk vigorously together the flour, baking powder, and salt.
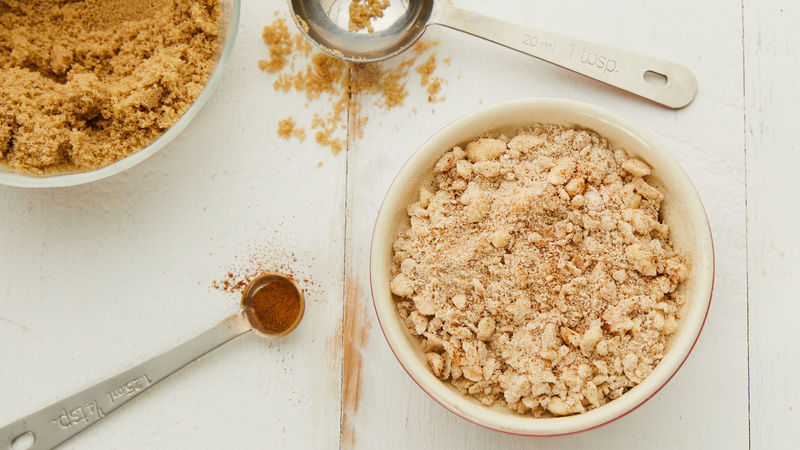
  3. Make cinnamon sugar: In a separate small bowl, mix 2 Tbsp of the sugar with the cinnamon, set aside.
  4. Beat butter and sugar, add eggs, add flour mixture and milk: Using an electric mixer, beat the butter with the remaining 1/4 cup sugar. Beat in the eggs until blended. Add the flour mixture in three additions, alternating with the milk, beating after each addition until just combined.
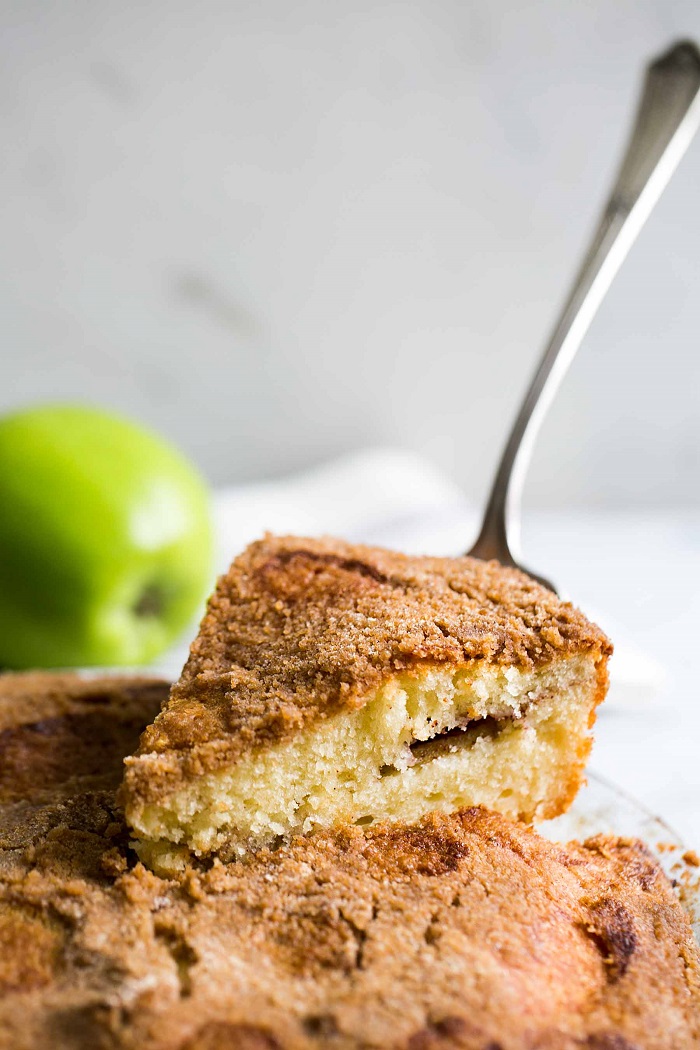
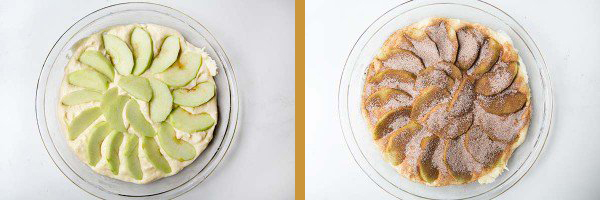
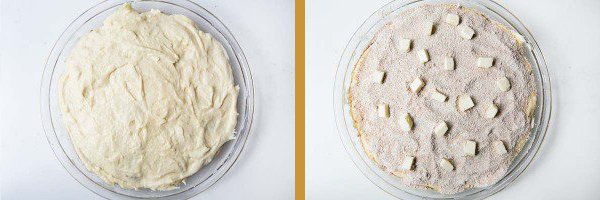
  5. Pour batter into baking dish, top with apple slices, cinnamon sugar: Pour half of the batter in the bottom of the baking dish. Lay the apple slices on the batter so they just cover the batter (you may have to overlap some slices). Sprinkle the apples with the cinnamon-sugar mixture. Spread the rest of the batter over the apples.
  6. Top with streusel topping: In a small bowl mix together the brown sugar, flour, and cinnamon for the streusel topping. Sprinkle over the cake and dot with butter.
  7. Bake: Bake the cake at 375°F (190°C) for 30-35 minutes or until it is golden brown and a tester inserted into the center comes out clean.

Crustless Apple Pie

Post|By |2019-05-02T15:27:14+03:00April 18th, 2019|Categories: ALL RECIPES, DESSERTS, Fruit Desserts, Cookie, ALL RECIPES, DESSERTS|Tags: , , |

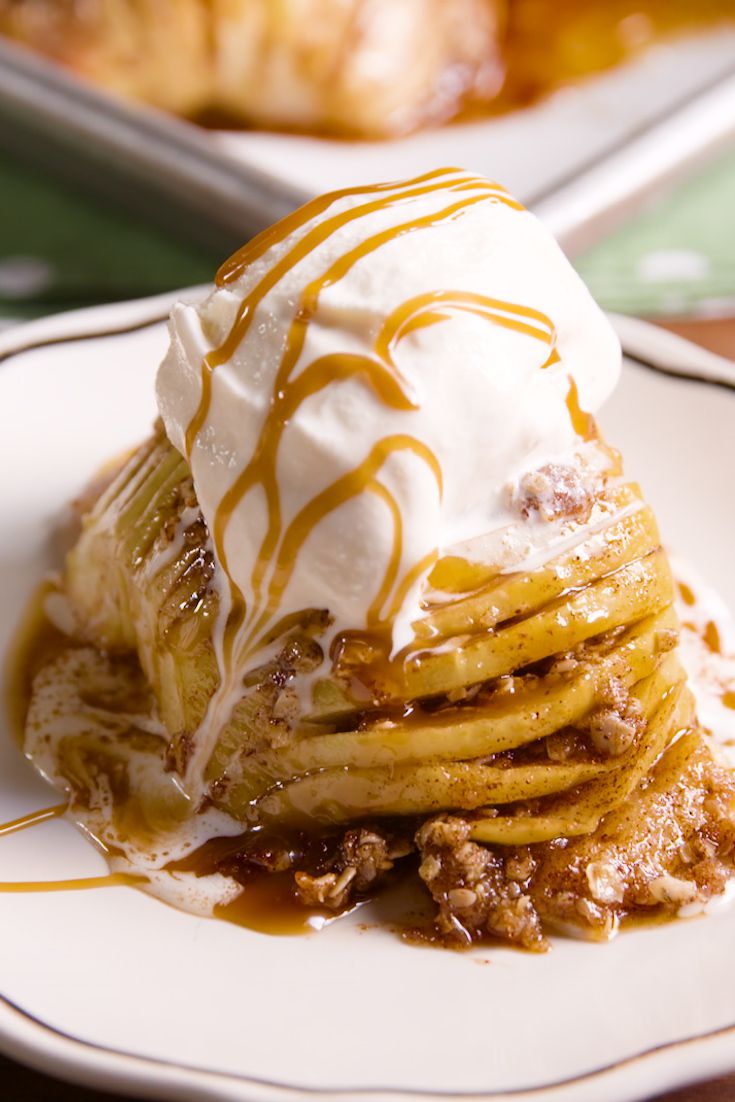
Crustless Apple Pies

Each one serves as an individual dessert that’s just waiting to be topped with a scoop of vanilla ice cream and a drizzle of warm caramel. Dig in!

Ingredients

6 large baking apples, halved vertically and cored
12 tbsp. butter, melted
1/3 c. sugar, plus more for sprinkling
2 tbsp. ground cinnamon
2/3 c. old-fashioned rolled oats
Vanilla ice cream, for serving
Warm caramel, for drizzling

Steps

1) Preheat oven to 350° and line a baking sheet with parchment paper. Place each apple half flat side down and use a paring knife to create thin slices all the way across, making sure to stop slicing right before the bottom of the apple (so it stays together as one piece). Transfer apple halves to prepared baking sheet.

2) Lightly brush apple tops with melted butter and sprinkle with sugar.

3) Bake until apples are soft and caramelized, 23 to 25 minutes.Remove from oven. In a small bowl, combine remaining melted butter, sugar, cinnamon, and oats. Once cool enough to handle, spoon mixture inside apple slits.
Return to oven and bake 10 minutes more.

4) Top each with a scoop of ice cream, then drizzle with caramel and serve.

Kaynak Delish

Lavender Cheesecake: Without Cheese and Sugar

Post|By |2019-08-02T19:39:31+03:00April 14th, 2019|Categories: ALL RECIPES, Cake + Cheescake, DESSERTS|Tags: , , , , , , |

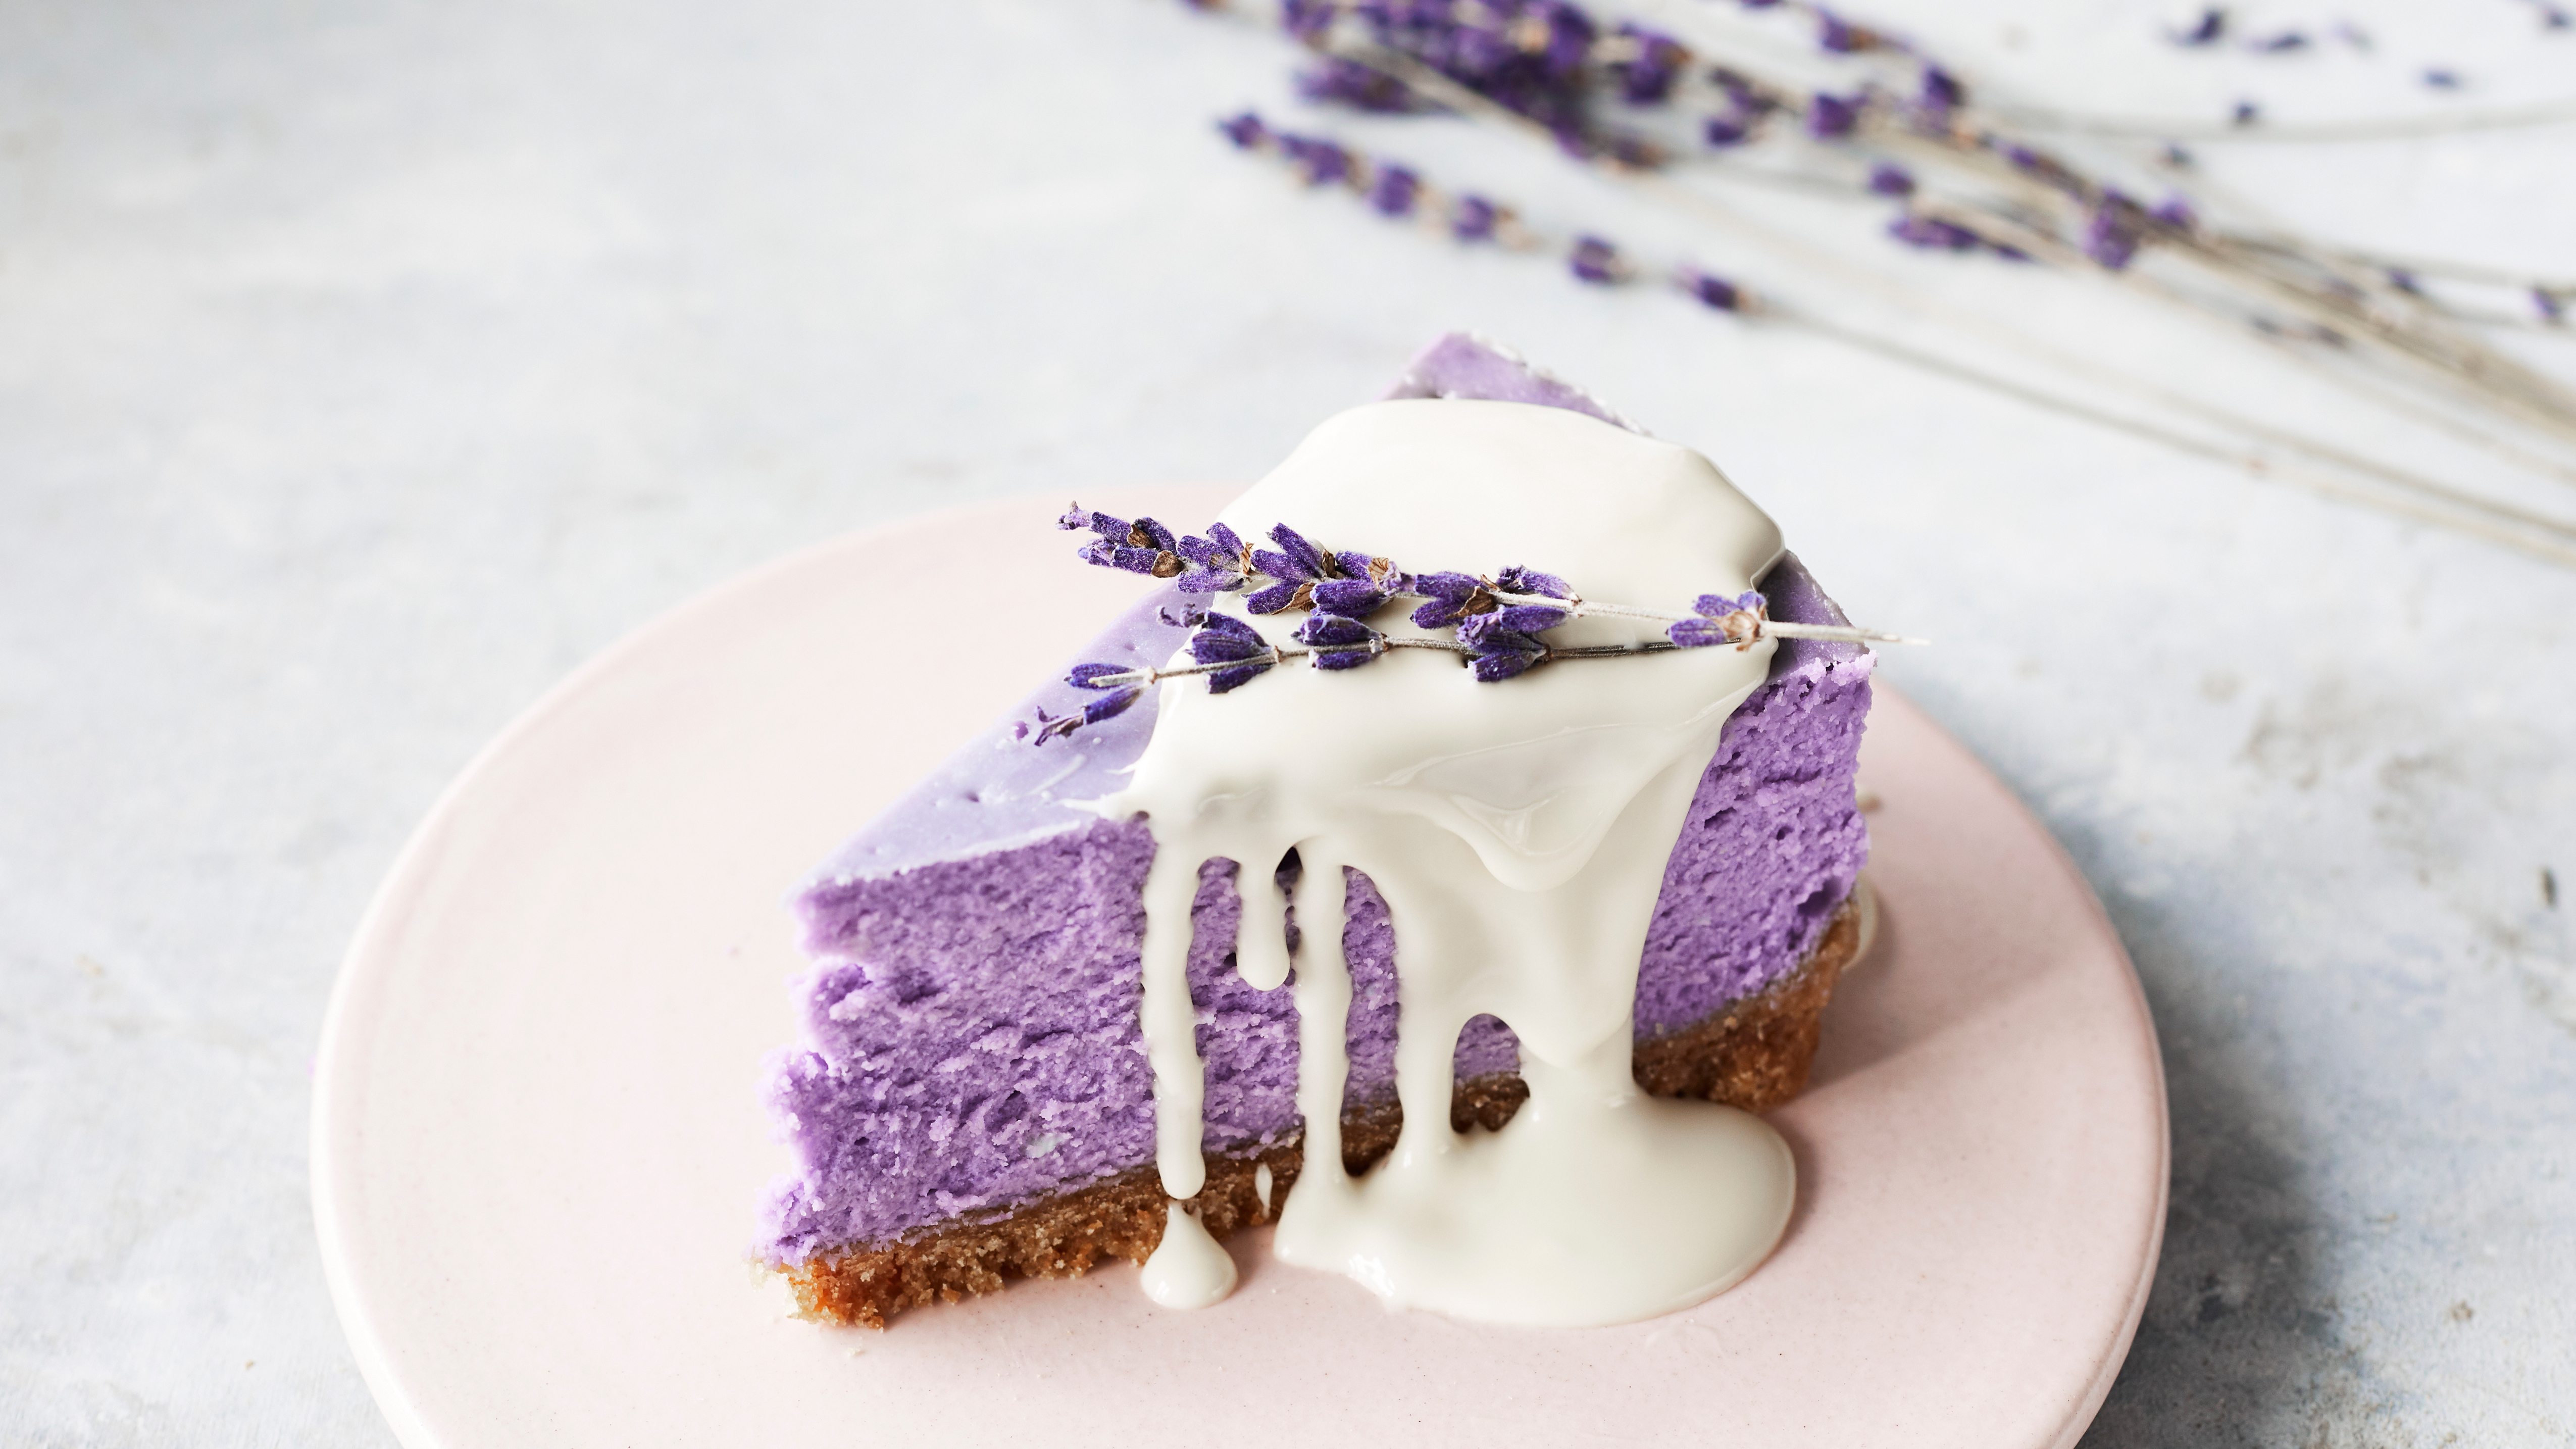
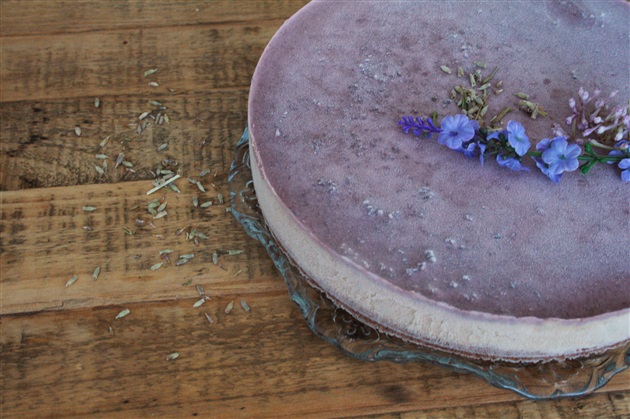
Lavender Cheesecake: Without Cheese and Sugar

Lavender cheesecake is one of the best tastes for those who want to pay attention to their form or older people can eat healthier desserts. Unlike other sweets with sugar and butter processed on its back, a healthy and easy to make dessert is waiting for us with its natural sugars and herbal ingredients.

When you hear the word “lavender,” you might immediately think of a lighter shade of purple. But there’s more to this herb than its color. Today, lavender is more than just a fragrant plant. As it turns out, this herb is also commonly used for medicinal and therapeutic benefits. So if you’re dealing with a few medical issues of your own, and you don’t want to risk the unpleasant side effects that come with many over-the-counter and prescription medicines, here’s a look at the potential health perks of using lavender.

lavender cheesecake

Ingredients

For the crust
2 cups almonds, soaked 8-12 hours
3 tablespoons raw cacao powder
2 tablespoons agave or honey
1 tablespoon organic cold pressed extra virgin coconut oil
Himalayan salt

For the filling;
3 cups cashews, soaked 2-4 hours
1- 1/2 cup almond milk
1/2 cup agave or honey
2 tablespoons lemon juice
2 teaspoons vanilla extract
2 tablespoons dried lavender
1 teaspoon cinnamon
Himalayan salt
1/2 cup organic, cold pressed, extra virgin coconut oil

For the sauce;
half culp blueberries
2 tablespoons organic cold pressed extra virgin coconut oil
3 tablespoons almond milk

lavender cheesecake

Steps

1) In a food processor, put the almonds and process them first. Then add the other ingredients and blend. Press the mixture into the base of a 22 cm springform pan

2) Blend everything in Vitamix and pour the mixture onto the crust

3) Blend everything in Vitamix. Pour on top of the filling.

4) Wrap the pan and place in freezer at least 1 hour.

You can place it in refrigerator 30 minutes before serving.

Go to Top